

EGR COOLER REPLACEMENT
Goss has re-engineered the PX Ranger cooler
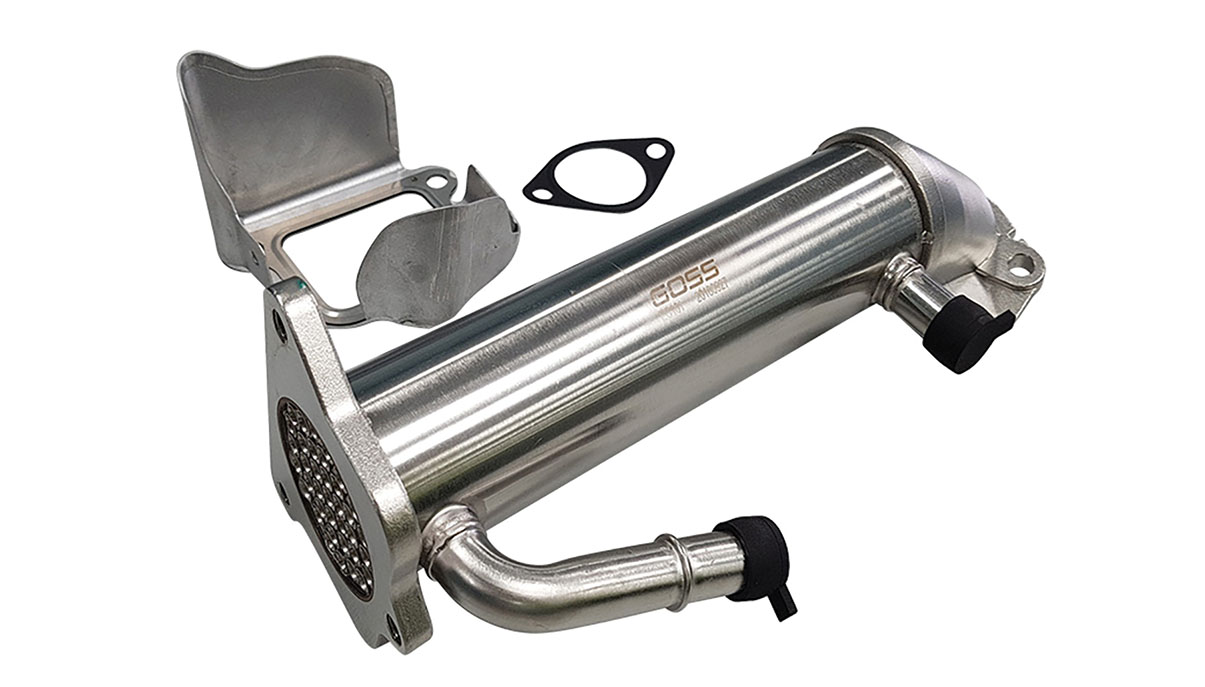
The Ford PX Ranger is a popular truck and like all mass-produced vehicles, Goss says they exhibit common failures after a period of time, with the achilles heel of this mighty truck said to be its EGR cooler.
Goss says original units have been known to leak coolant either externally (from around the flanged joints on either side of the cooler) or internally, whereby coolant leaks into the engine’s intake system – pulled along by the recirculated exhaust gasses. Both of these failures are cause for EGR cooler replacement.
Goss says it has re-engineered the PX Ranger cooler and developed a new manufacturing process to produce a superior product which is less prone to cracking or leakage.
Unfortunately, using a quality replacement part is only half the battle – installation of these units requires additional inspections and a very concise coolant bleed procedure.
Step one: inspect the failed unit to determine the cause of the original failure.
A leak due to corrosion will require the cooling system to be flushed before installation of the new unit.
A split core may have been triggered by over pressurisation. Be sure to check for cylinder combustion leaks.
A leaking coolant hose can draw air into the system resulting in hotspots and poor flow through the cooler.
Make sure the heater core has not been bypassed.
This practice removes a critical part of the cooling system – again resulting in reduced flow through the EGR cooler.
Check if the EGR valve itself has not been blanked off. The EGR needs to function to ensure correct and efficient cooler operation.
When installing the new cooler, replace the mounting bolts with new units and torque to manufacturer specifications using mild strength thread locking compound as they are prone to vibrate loose causing the cooler to crack.
Step two: bleeding procedure
Goss says vacuum bleeding is the only way to guarantee there are no airlocks within the system during coolant fill. This will prevent repeat failure of the cooler.
Attach the bleed adaptor to the coolant fill point and open the air valve. After a few minutes of operation, the coolant hoses will flatten, and the pressure gauge will stabilise with a negative value. Close the valve and disconnect the shop air supply.
Monitor the gauge for a few minutes for any rise in pressure. This indicates an air leak that must be rectified before continuing. If the gauge remains at negative pressure during this interval, then the refill process can begin.
Keep an eye on the coolant level in the fill container – do not let the suction hose lift air or you will need to start again. When the gauge rises to zero the system is full with no air locks, start the engine and allow it to warm up.
Confirm the thermostat opens by checking temperature at both top and bottom hoses. Remember to recheck for any leaks through a full temperature cycle of the cooling system.
Goss is a leading provider of Genuine Alternative aftermarket and Original Equipment Supplier (OES) parts.
With over 75 years sourcing and developing the world’s leading OES and aftermarket parts, Goss says it prides itself on offering workshops “the Genuine Alternative.”
For more information or the details of your nearest stockist, visit www.goss.com.au